Make your own natural Easter egg dye
As spring reveals itself each year after what always seems like a long winter, we know that families everywhere can’t wait to open their windows, plant their gardens and enjoy celebrating the spring holidays. Habitat homeowners often share with us their excitement about the family gatherings and special occasions made even more special in the homes they’ve built and the communities they so actively participate in.
During this time of hope and renewal, dying Easter eggs is a favorite tradition for many. But did you know nature provides her own ways to dye eggs that are safe and non-toxic? Below, writer Emily Grimm takes you step by step through her process for dying Easter eggs naturally — a fun experiment for homeowners and supporters alike!
Getting started
When I was a kid, one of my favorite activities to do with my family was egg dyeing for Easter. I just loved transforming our kitchen into a mini art studio and putting my “masterpieces” on display. Fast forward a few decades, and I had recently heard about “green egg dyeing” for Easter. As in, an activity that was safe, non-toxic and that you could simply do at home with your kids, as a family. I decided to do some research on natural Easter egg dye and give it a whirl.
I cannot believe how many colors I was able to make straight from natural ingredients. What beautiful colors our world provides. Why wasn’t this a big thing when I was a kid?
The experiment went as follows. Some fruits and vegetables gave me much different colors than I was expecting!
General supplies for any color
- Widemouthed Mason jars (the regular mouth Mason jars were too narrow to extract the eggs from, and, unfortunately I had a few casualties because of it).
- White vinegar.
- Alum powder (this helps to brighten the color of the dye).
- A pair of tongs to extract the eggs.
- A strainer.
Supplies based on color
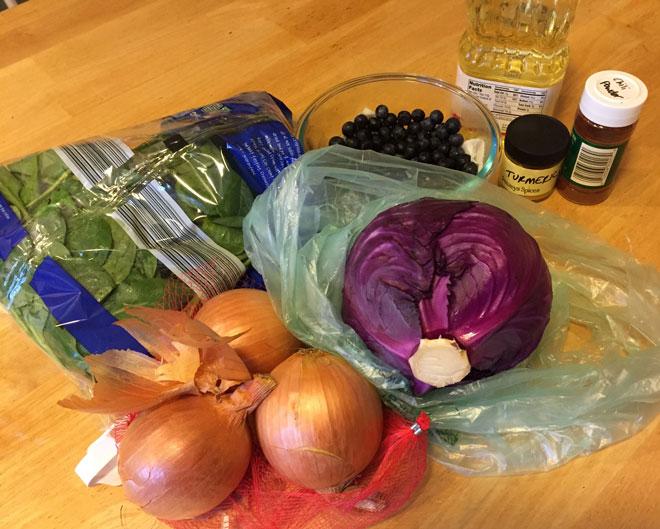
- For yellow – a bag of spinach.
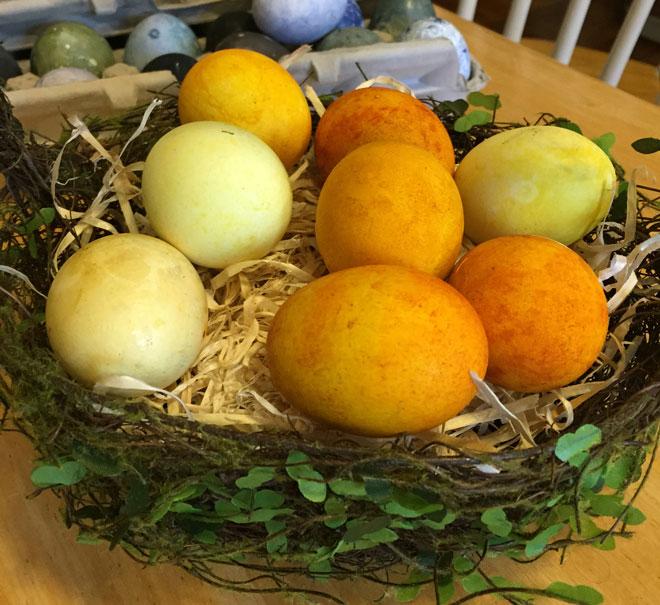
- For orange – three to five yellow onionskins and 2-4 tbsp. turmeric powder.
- For red/brown/orange – ¼ cup chili powder and cayenne pepper.
- For blue/purple/lilac – ½ head of purple cabbage.
- For green – three to five cups of frozen berries (blueberries and raspberries).
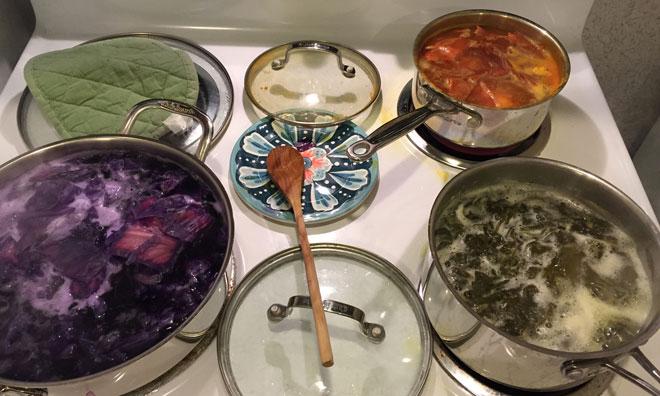
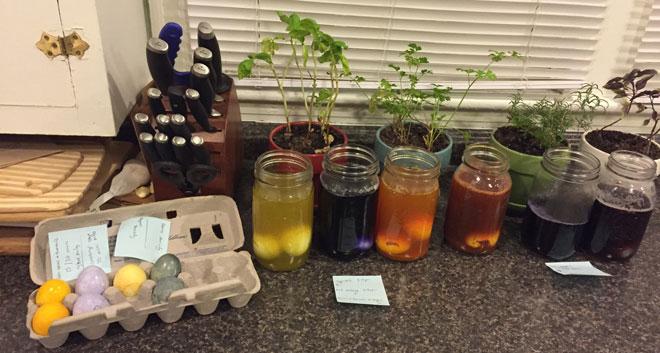
Pictured on the far left is red cabbage (purple/blue), on the upper right are onionskins and turmeric (vibrant orange) and on the bottom right is spinach (pale yellow).
How to make dyes – light colors
- In a pot, place chopped ingredients and just cover with water (the more diluted, the less vibrant the color), and bring to a boil for a good 30 minutes.
- Add 1 tbsp. of alum powder.
- Add 1 tbsp. of white vinegar.
- Turn down stove to a medium boil to help keep the eggs from cracking once you place them in the pot.
- Gently place uncooked eggs in the boiling liquid, being careful not to “drop” them hard into the solution.
- Depending on the color you desire, leave eggs to boil for 15-30 minutes.
How to make dyes – dark colors
- Strain the colored liquid into a widemouthed Mason jar.
- Transfer eggs over to a jar carefully with tongs.
- Leave eggs overnight or until desired color is achieved. For my darker eggs, I left up to 15 hours.
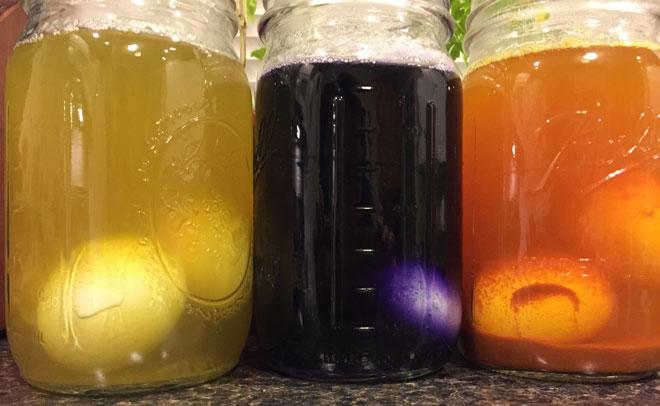
The sediment, best pictured in the far right orange jar, is totally normal. It adds some nice color patches on different areas on the eggs.
For fun patterns
- In the Mason jar, before adding white hard-boiled eggs, add 1 tbsp. of oil.
- Add the eggs. The oil that sits on the top of the liquid helps to put a nice coating on the eggshell in certain areas, preventing the dye from penetrating the eggshell, leaving all kinds of neat patterns, dots and swirls.
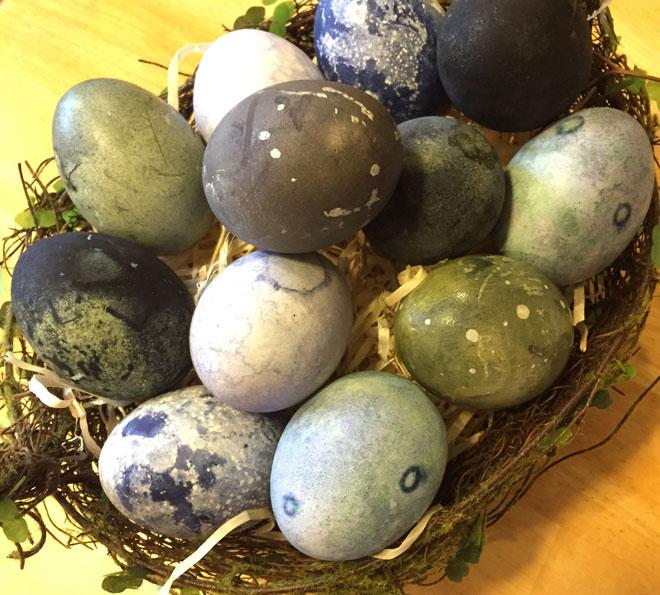
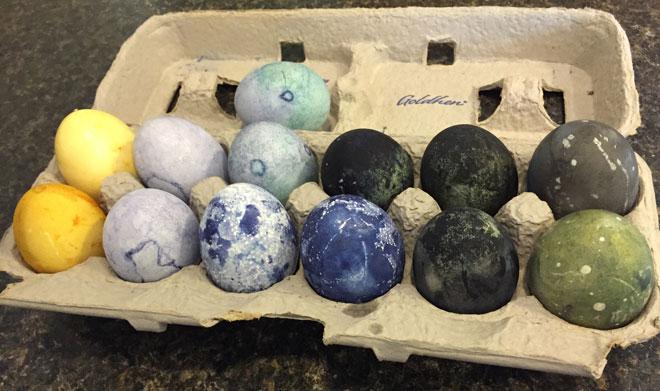
The blue speckled eggs in this photo, along with the green eggs, had oil added to their Mason jars.
Egg timing
I kept track with sticky notes on how long I left each egg in the different color dyes, and what was in each jar.
This project really brought me back to my childhood. It was simple, and also a lesson of how powerful and bright natural dye can be. Perhaps I should see if my mom wants to dye eggs with me again. Hopefully, she will say my “masterpieces” have improved from when I was in elementary school.
Subscribe
Sign up for our monthly newsletter to get the latest news, volunteer opportunities, DIY tips and other ways to get involved with Habitat for Humanity.