DIY: Ways to upcycle a coffee table
A couple of weeks ago, I got really lucky and found a lovely coffee table on the side of the road. My husband and I had just moved into a new apartment, and I had been looking for a coffee table but didn’t like the looks (or the prices) of the ones I had seen in other stores.
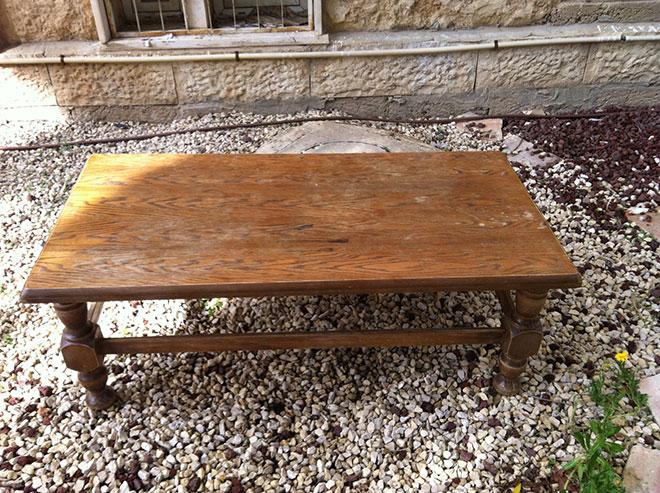
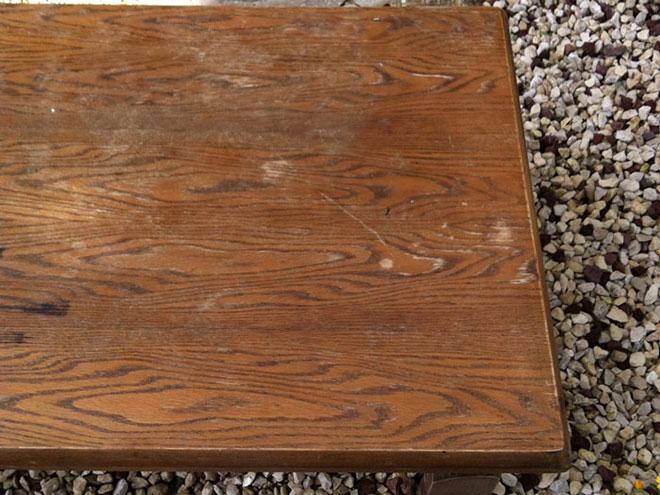
Finding it was a win, but its condition was far from living room presentable. I figured I would follow Hometalker Naomi’s post (Delight Creative Designs), and just sand it, stain it, coat it with some protective polyurethane and call it a day, right?
If you’re an experienced DIYer you probably nodded and said, “right!” but if you’re like me, you might find this task a bit daunting because, well, you’ve never sanded and stained anything in your life. If this is the case, let me say that if I can do it, then you, DIY newcomer, can do it too!
First, make sure you’ve got a good working station, preferably in a workshop or a backyard, where you can spread saw dust and stain droplets to your heart’s content.
I began by sanding the whole table down. The table top was covered in a strong protective layer, and though it had been scratched through and damaged in some places, other places were holding on for dear life. After I had sanded my knuckles to the bone, I decided to try a rotary sander. I had three grit levels, so I started with my heaviest, applying pressure and moving the sander slowly up and down the table, before switching to medium and then light grit.
The legs would not work with the sander (as I discovered after sanding a curved edge clear off), so I had to do that bit by hand. It was pretty troublesome, and for future reference, when I think I can do all my sanding without a block, I know I’m just being lazy.
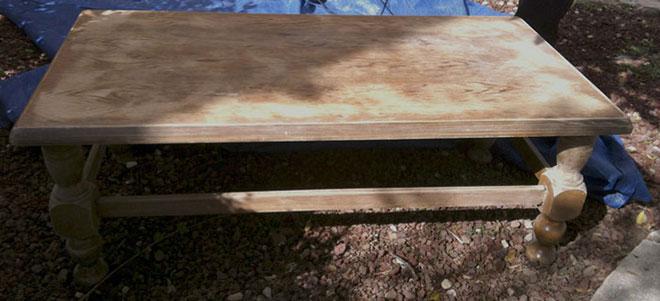
Now I had an ugly, very light-colored coffee table covered in a thick layer of sawdust, so before I could stain, I had to use a cloth to wipe all that grit away. You’ll want a clean and porous surface for the stain to really be absorbed into the wood, so this step is crucial. I had cut a soft cotton T-shirt into squares for staining, so I just used one of those to wipe the table off.
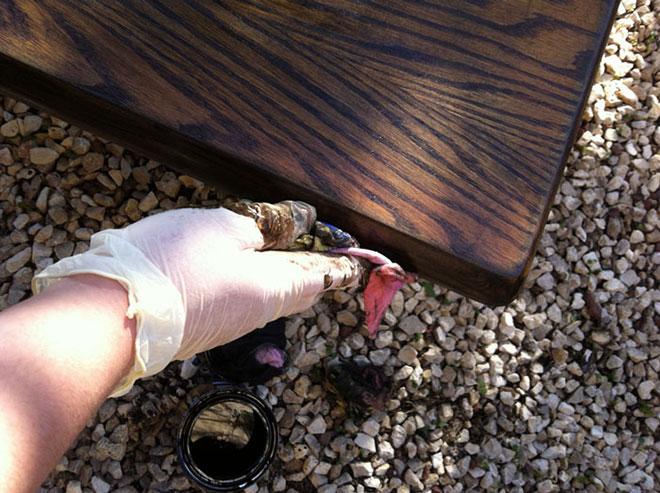
When I was ready to stain I put on some rubber gloves, opened and mixed my dark wood stain (pigments can settle on the bottom, so mixing is a good idea if you want it to work), and dipped a square of cloth in.
You should apply your stain generously, wiping against the grain to lay down a pretty thick layer. Then, use your cloth to spread that stain, keeping your direction and applying pressure evenly throughout. When you’re done coating your wood, use a clean rag to wipe off the extra stain—a heavier coat of stain will not leave a clean, darker color; it will make your piece look unevenly coated and might leave spots or streaks.
The table top I actually did right—I spread the stain on the table top and sides before wiping away the extra stain that hadn’t absorbed into the wood. It looked evenly covered, not splotchy or streaky, and I was pretty proud of myself. For the legs and lower bars however, I decided to do each one before wiping away the extra from all of them at once—it had worked before, right? Well, I hadn’t counted on the stain drying quite so quickly, and removing the unabsorbed surface stain was a bit tougher and left a couple streaks in some places.
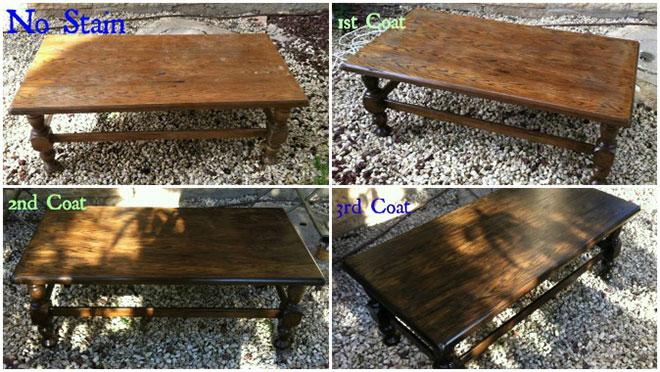
I stepped away to admire my work and was a bit dismayed to realize that, though I had been going for a darker color than the original, it looked pretty much the same as it had when I started, without the damage. All I could do was hope the second coat would give it the look I dreamed of—the look that, incidentally, matches our living room bookshelf and would tie the room together perfectly.
After the first coat was dry and the rain had stopped, I dragged my table out of its makeshift shelter and added the second coat. I wanted a warm, dark finish at the end, so it was going to take a couple of coats. Here’s how the second coat went down.
It didn’t take long and I was more generous with applying the stain and quicker about removing the excess stain, so after about 20 minutes, it looked pretty good!
Then after coat no. 3:
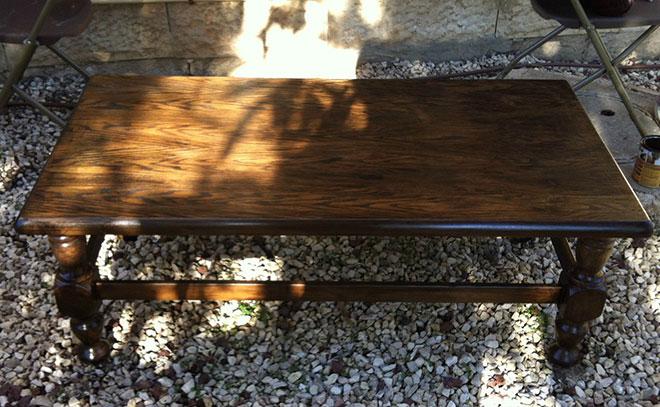
After three coats of stain, it was ready for some polyurethane. Which of course meant it was ready to rest for half a day, get coated and then rest for another half a day before a second coat. Whew! This staining business is a long-term commitment!
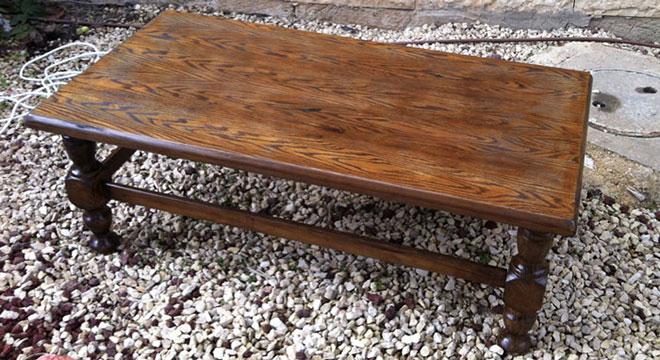
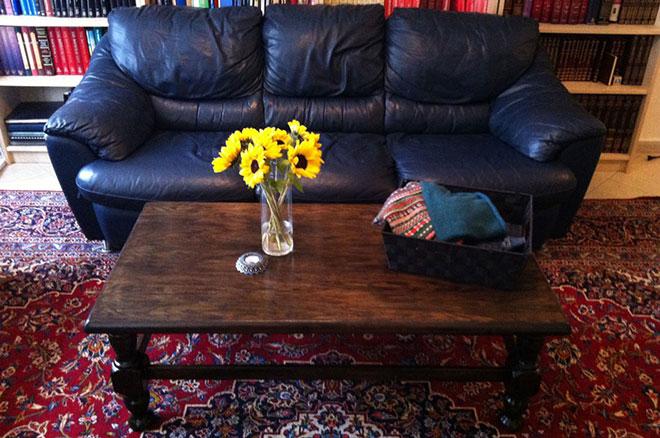
After two protective coats of polyurethane, this refinished coffee table was ready to join my household. With a bit of coffee table styling, my new dark coffee table was done—and well worth the effort!
Do you have your own find you would like to bring back to life? Check out Hometalk’s topic page on painted furniture for some great tips and inspiration!
Tikva Morrow is a writer and editor for Hometalk, the largest home and garden knowledge hub on the Web. She specializes in home improvement, DIY and projects involving repurposing and upcycling, and loves writing, redecorating and really good coffee. If you want to get in touch with her, you can reach her at [email protected].