How to upcycle cabinet doors into a DIY plant stand
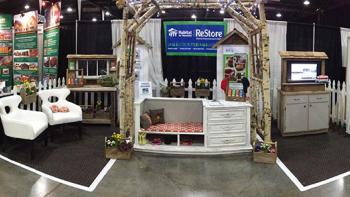
I spied cabinet doors at my local Habitat for Humanity ReStore, and they inspired a DIY project idea. I could upcycle them to make a repurposed shelf that could act as a DIY plant stand.
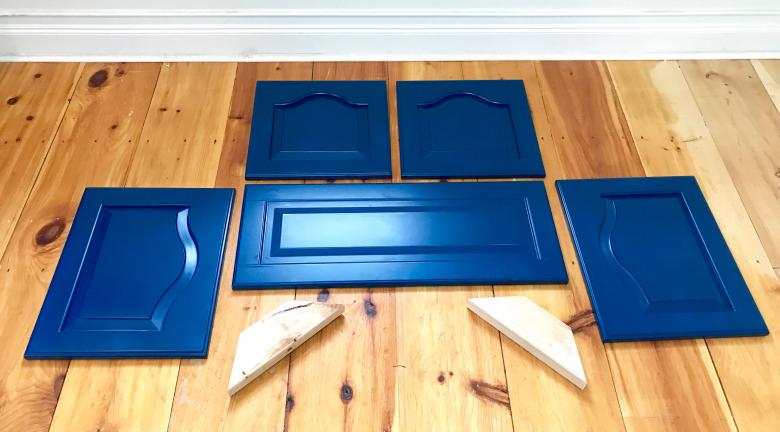
I spent a few minutes laying out the various doors to find four doors the same size, and one that is twice the width of two of the four doors. Since most cabinet doors are made based on a 3-inch system, it’s fairly easy to find five doors that fit this requirement.
The total cost for the five cabinet doors was less than $20.
Supplies needed:
- 5 cabinet doors from Habitat for Humanity ReStore
- 1 can Krylon primer spray paint
- 1 can Krylon Satin Jade spray paint
- 1 can Krylon Oxford Blue spray paint
- Two-by-four (a two-by-four can be cut for you at most home improvement centers)
- Fasteners
- Measuring tape
- Impact driver or drill
How-to:
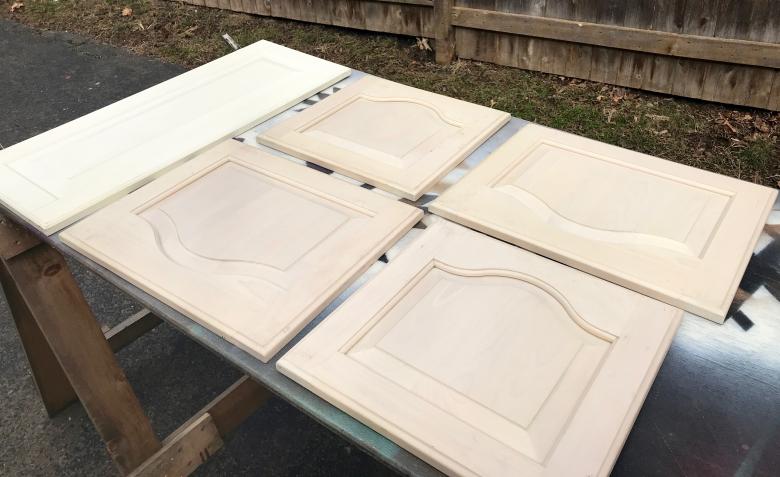
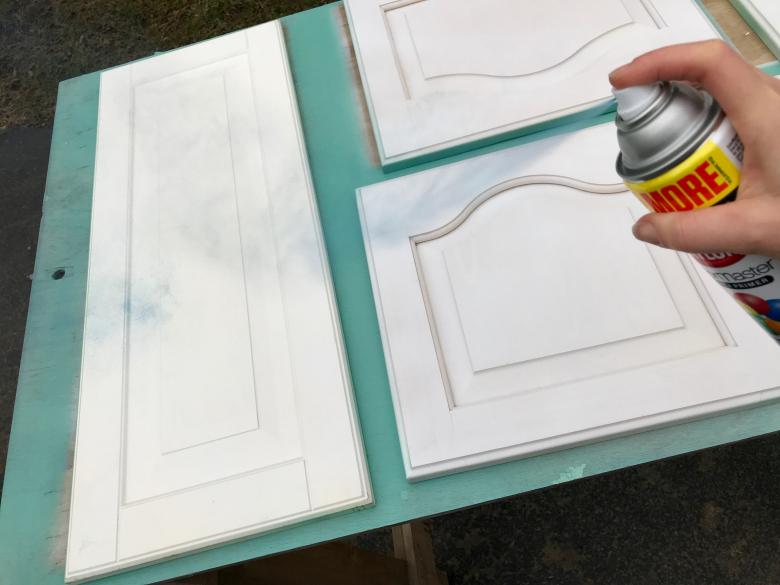
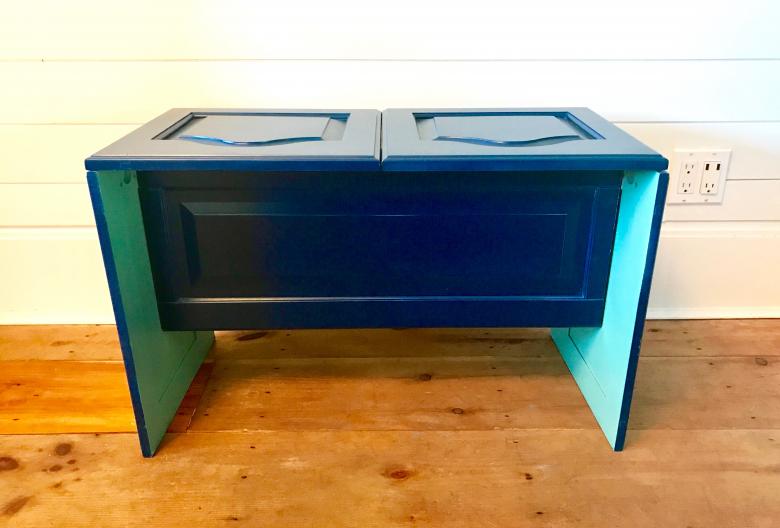
The first step to this project is painting the cabinet doors. After priming all of the sides and letting them dry, spray paint the backside of the doors. I chose a calm green called Jade.
DIY tip: When using spray paint, I’ve found that the best finish comes from applying several light dusting coats instead of trying to match the color on the can in the first pass. Having patience during DIY projects boosts the potential success of the after look. Rushing through tends to invite opportunities for mistakes and mishaps.
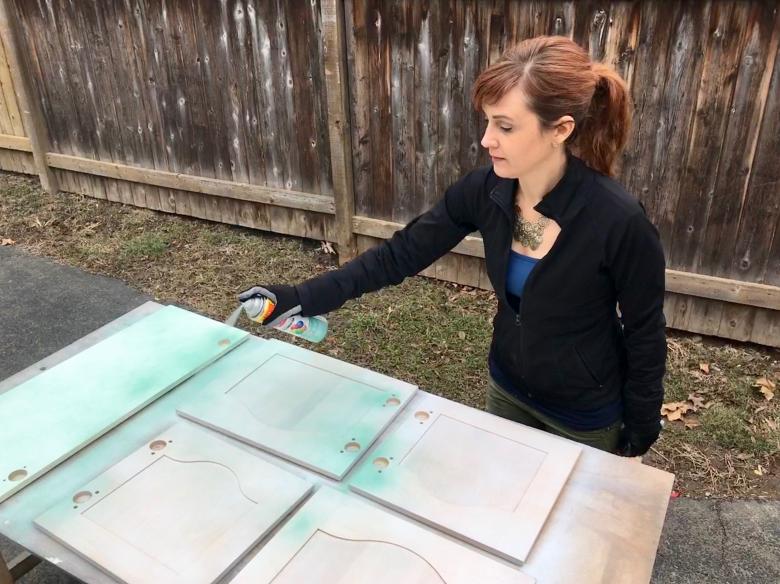
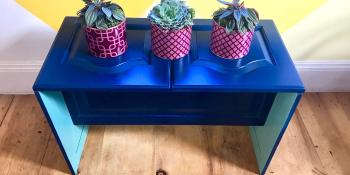
After the three dusting coats of paint are dry, turn over the doors and paint the other side. I chose a rich Oxford Blue as a contrast to the Jade backside.
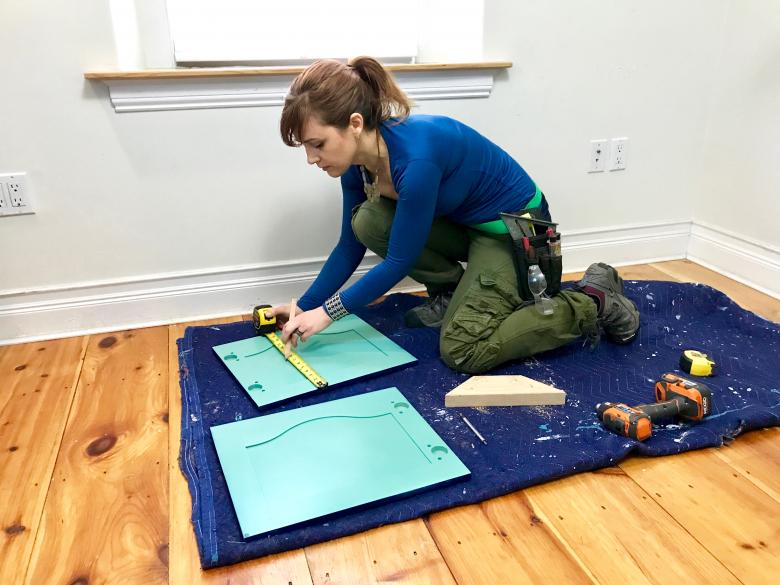
While the paint dries, cut two brackets from a two-by-four. The length depends on the size of the cabinet doors chosen and where the brackets are placed inside the construction of the shelf. To determine the length, place two cabinets at a 90-degree angle. Measure the hypotenuse distance from the inside edge of each door at about one-third of the way down each edge from the corner. (See the photos of the how-to steps below).
The brackets are mitered on each end so that they will fit inside the corners of the shelf, creating extra stability. Before moving on to assembly, decide whether the brackets should be painted. I didn’t paint the brackets in my shelf, as I planned to place them behind the long inside support door.
After all of the pieces are ready to assemble, lay out the pieces as they will be fastened together. If there is a pattern on the cabinet door, make sure to intentionally choose which way the pattern will face. Symmetry is usually the easiest method for layout.
The first step of assembly is attaching the two-by-four brackets. Measure the centerline of the doors that are on the right and left of the assembly layout. These will form the outside vertical elements of the shelf. If there is pattern on the face of the door, double-check the orientation of the door.
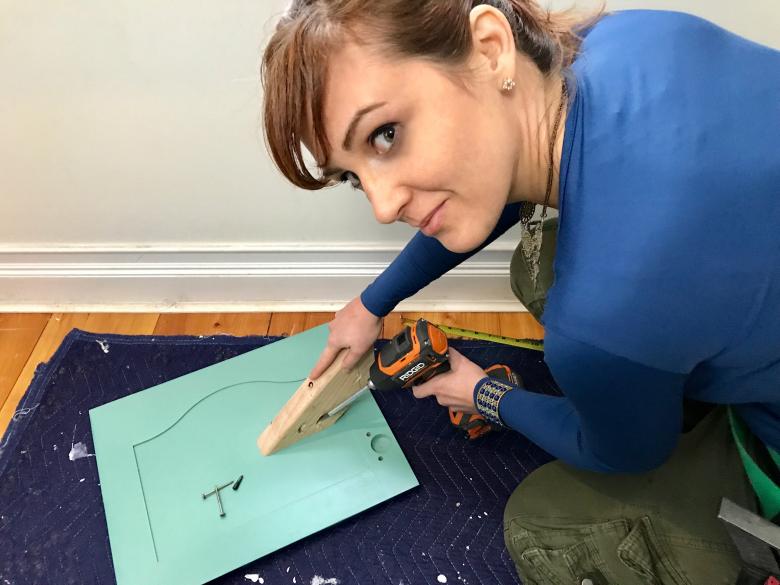
Now it’s time to attach the pieces. Check the length of the screws to make sure they won’t pop through the face of the cabinet. Drill a pilot hole and then use fasteners to attach the bracket to the outside door. I used two screws to attach the bracket to each door face.
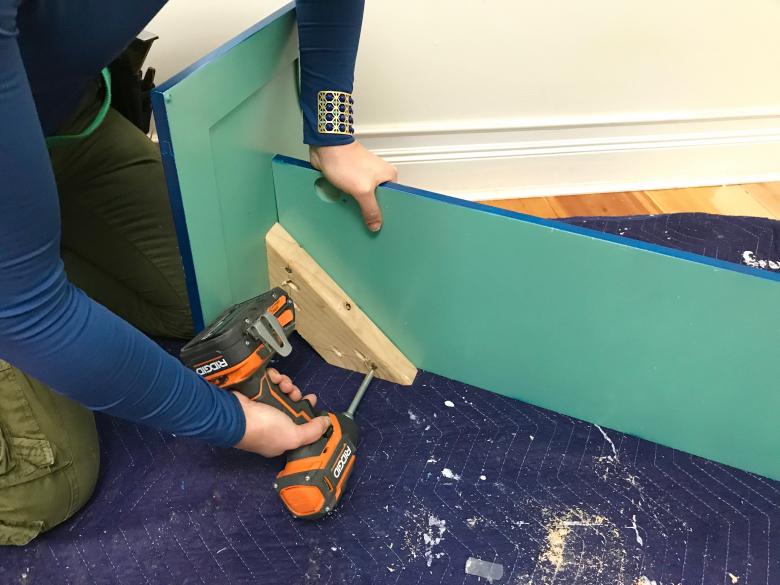
Now we are ready for the long cabinet door. This door is perpendicular to the side door. Attach the bracket and then repeat for the other side.
After the sides are secured to the longer door, it’s time to secure the last two doors. Fit the doors in between the side doors, and then attach each to the two-by-four bracket. Use the same pilot hole/pocket hole method for the side panels.
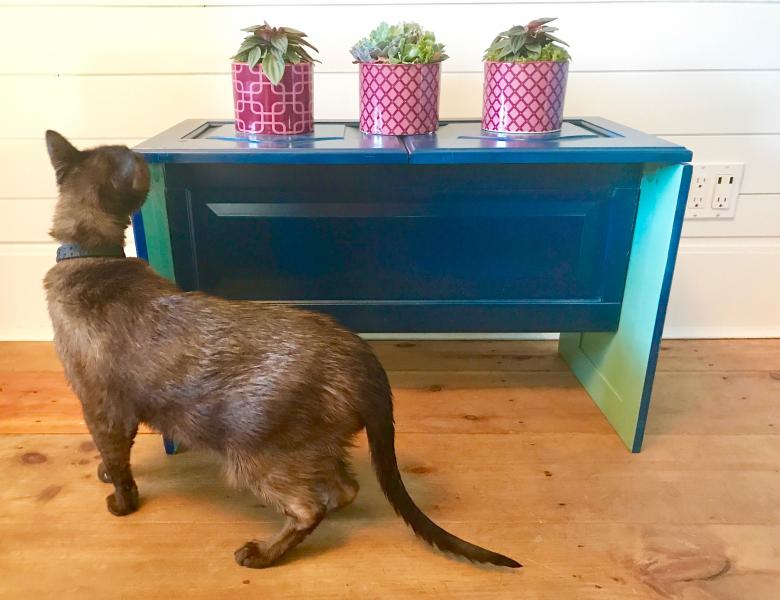
I think that my cat Rowdee approves, but he also may be thinking this upcycled shelf would be better used as a cat perch than an indoor garden shelf.
Theresa Clement co-hosts the MyFixitUpLife talk show with her husband Mark, who is her partner at work and at home. She is the designer for Food Network’s “Save My Bakery,” and designed for “Extreme Makeover: Home Edition.” She is a licensed contractor, certified color consultant and certified aging-in-place specialist with a focus on Alzheimer’s. She is an author of Do-It-Yourself Home Improvement, DIY Quick Fix and Complete Guide to Shelves & Built-Ins. You can get in touch with her on Twitter for any DIY questions you may have!