A secret garden of found treasures for my child
I absolutely love DIY projects, but I do believe that my favorite type involves a lot of nature as well as a nice variety of repurposed items. There’s just something about using what I have on hand or random found treasures that I obtain from the Habitat ReStore, flea markets and even from friends and family that always inspire me to create something unique and amazing. For instance, my daughter Ava loves to pretend she’s in a faraway location, and I am constantly thinking up new ideas. So we created an area for Ava to do just that.

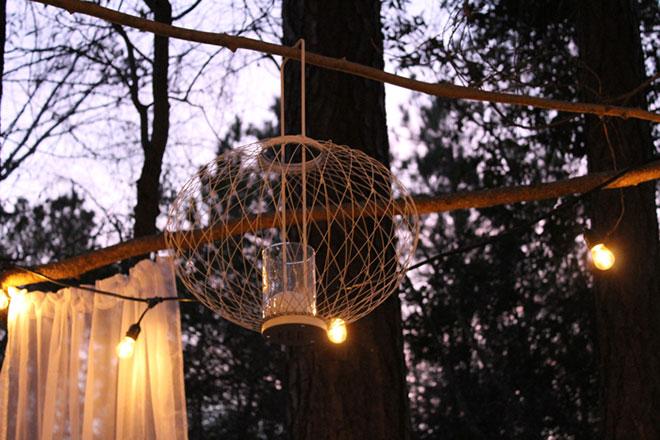
For this project, I only bought one new item which was a lantern. Everything else was given to me by a friend, purchased at the Habitat ReStore, recreated by my husband or me or found randomly in our woods behind the house (aka nature).
Here’s what you’ll need for this project
Materials
- 3 curtains (these are sheer)
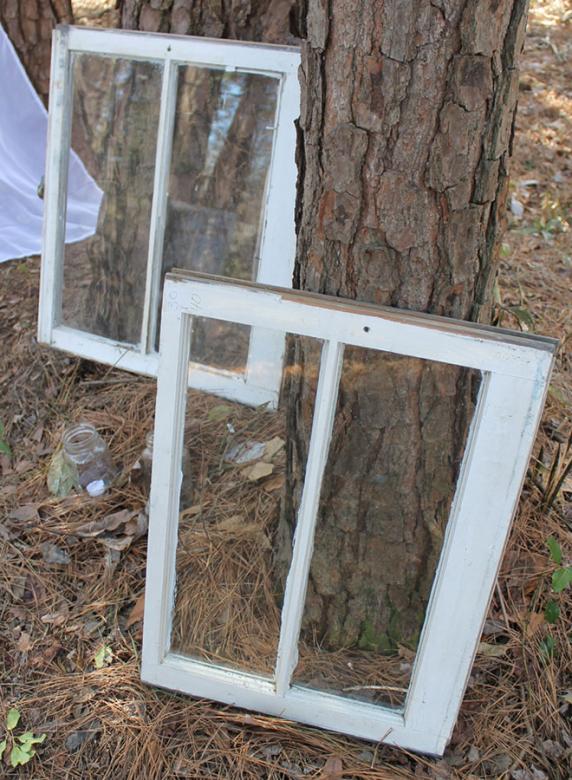
- 8 old windows
- twinkly plug-in lights
- candles
- lots of mason jars
- plenty of branches and logs/stumps
- cups and saucers
- twine
- teapot
- reclaimed wood (for signs and bench top)
- screws
Tools
- screwdriver
- reciprocating saw (or something similar to cut down branches)
- scissors
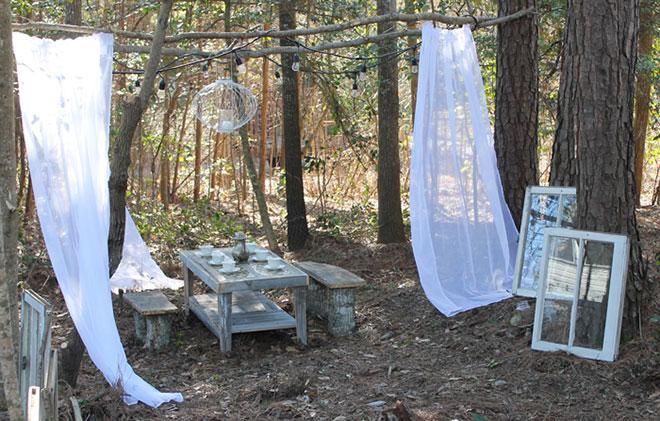
Depending on where you would like to put your tea party will ultimately depend on how much work it will take to create. I first had to clear out a section of our woods since I wanted it to be tucked away. This particular cleanup took an entire Saturday to complete, but it was totally worth it!
Once the section of woods was cleared, the very first thing that I had to figure out was an entrance. I used two existing trees, screwed a branch to either side and added a few mason jars (twine was used to hang them). Next, I tossed a few logs in a pile on either side of the entrance to also give it a more prominent look since it’s too cold to use flowers right now.
Since this is going to be an area dedicated just for my daughter, I wanted to make sure that wherever I put the windows they were securely in place. So I cut down a few more branches just a few inches longer than the window they would be attached to and screwed them into the sides.
Hint: try not to use branches that are too thick (it’ll be hard to screw them into the frame) or too thin (they’ll crack in half!). I do believe most of mine were approximately 1.5” across.
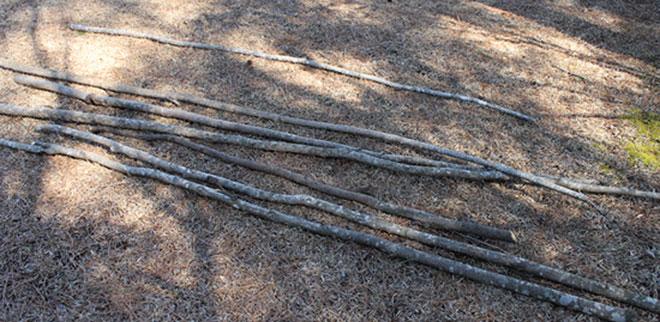
With your reciprocating saw, cut a slight angle on the bottom of the branch so it will be easier to push your window into the ground. I live in a flood zone so the ground around my home is super easy to work with. You might need to create a hole in the ground first depending on your soil quality.
Isn’t this cute and inviting? I just lined up a few of these on each side of the walkway, and then added a few mason jars with candles in between them. Hopefully when it gets a little warmer I will be able to add prettier plant life in front of them.
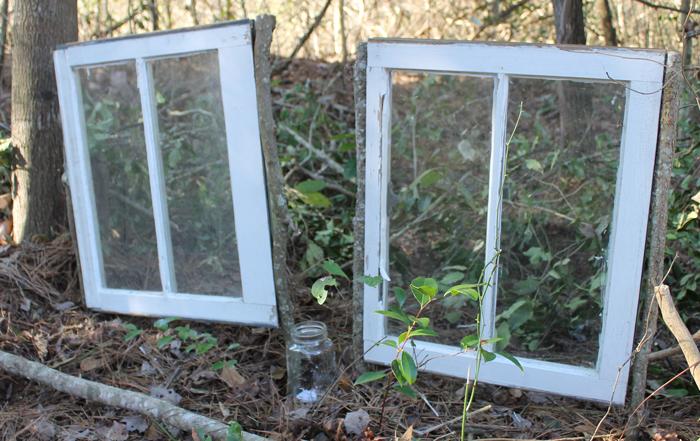
I set the remaining windows against a few trees closer to the actual tea party site to add a little bit of variety as well. These windows below were screwed into the tree they are resting on just to ensure they wouldn’t fall over.
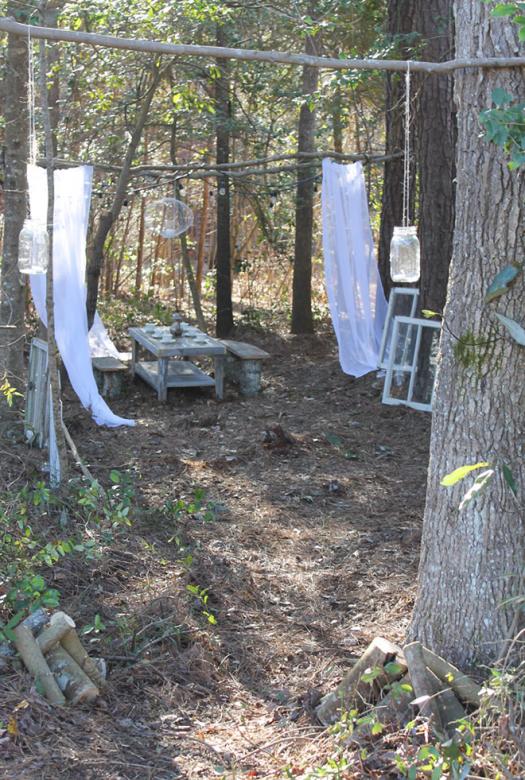
For the actual tea party location I used a reclaimed wood and tile coffee table that my husband built about a year ago. We used to sell these beauties at craft shows and just so happened to have one left. I hate wasting items (or space!) so I decided this would be the perfect fit for the little one. I then used cups and saucers from the Habitat ReStore, and my neighbor happened to have a teapot that she no longer needed.
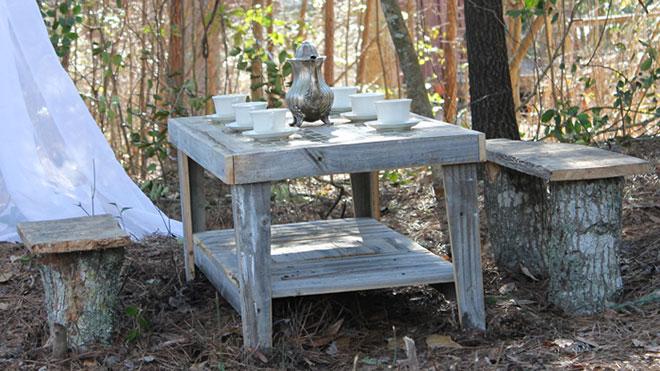
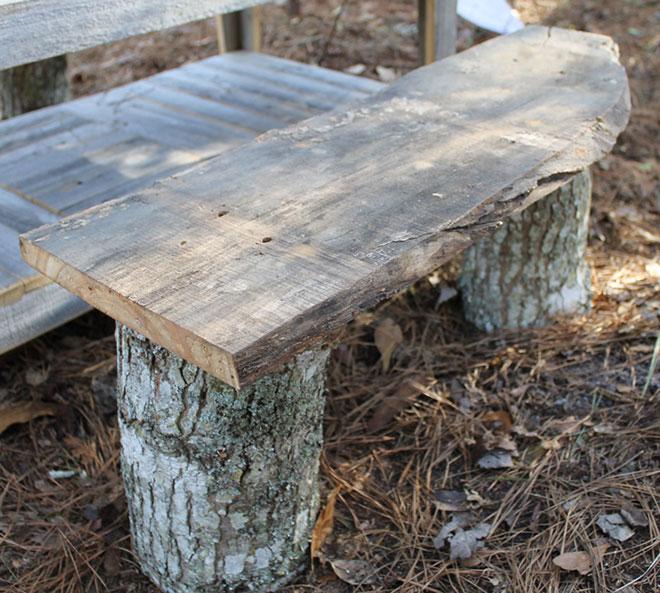
The benches were simply constructed of two logs and a piece of reclaimed wood screwed into them.
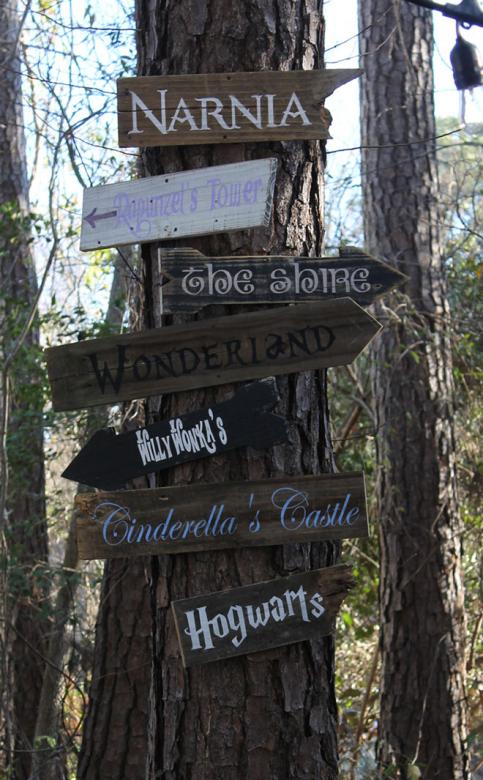
Next, I created a fairy tale totem pole with all of our favorite fairy tales on reclaimed wood.
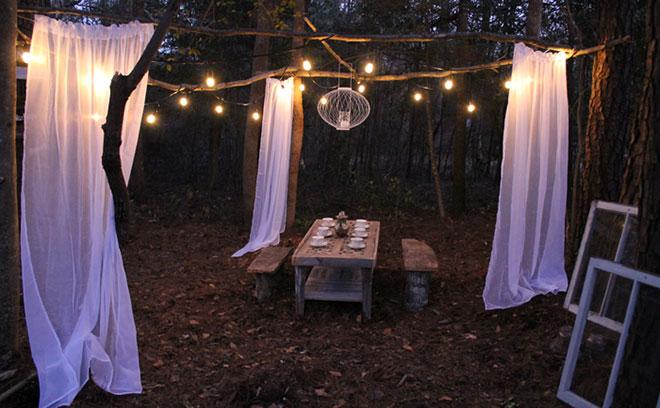
Now, I have to admit, I had to think awhile about how to put up the curtains and “ceiling” for this tea party. I was originally going to do an abstract and haphazard kind of thing, but the trees that were around weren’t exactly in the right location to do such a project. So, I had to improvise. I basically took three branches and created a triangle in the air. Then, I put another long branch down the center (and over the coffee table) that I hooked my lantern to.
Then, with twine I strung the curtains in each corner of the triangle attaching them to the branches.
Last, I hung up the twinkly lights. Even at night, this gorgeous little getaway looks amazing!
LZ Cathcart is the owner and creator of The Summery Umbrella shop and blog. Her shop is filled with reclaimed wood wall décor that incorporates rustic but modern designs. The Summery Umbrella blog is a rustic lifestyle blog that includes everything from DIY projects, food recipes, inspiration as well as home décor. She currently resides in Burgaw, North Carolina, with her three-year-old daughter, husband and three seemingly Houdini-like dogs.